Breakpoints and stepping
Breakpoint is a marker on a command block. When the program reaches it, it stops before executing, sends the values of the project variables, and waits for your next command.
Add and remove breakpoint
- Stop the program with the Stop button.
- In Settings → Program Debugging select, for example, Immediate.
- Right-click on the command block and select Add breakpoint.
- Press Run code.
The block will be marked with a warning icon. Her description says Breakpoint – pause before this block; therefore, the icon itself may not indicate a program error. To delete, open the same menu and select Remove breakpoint.
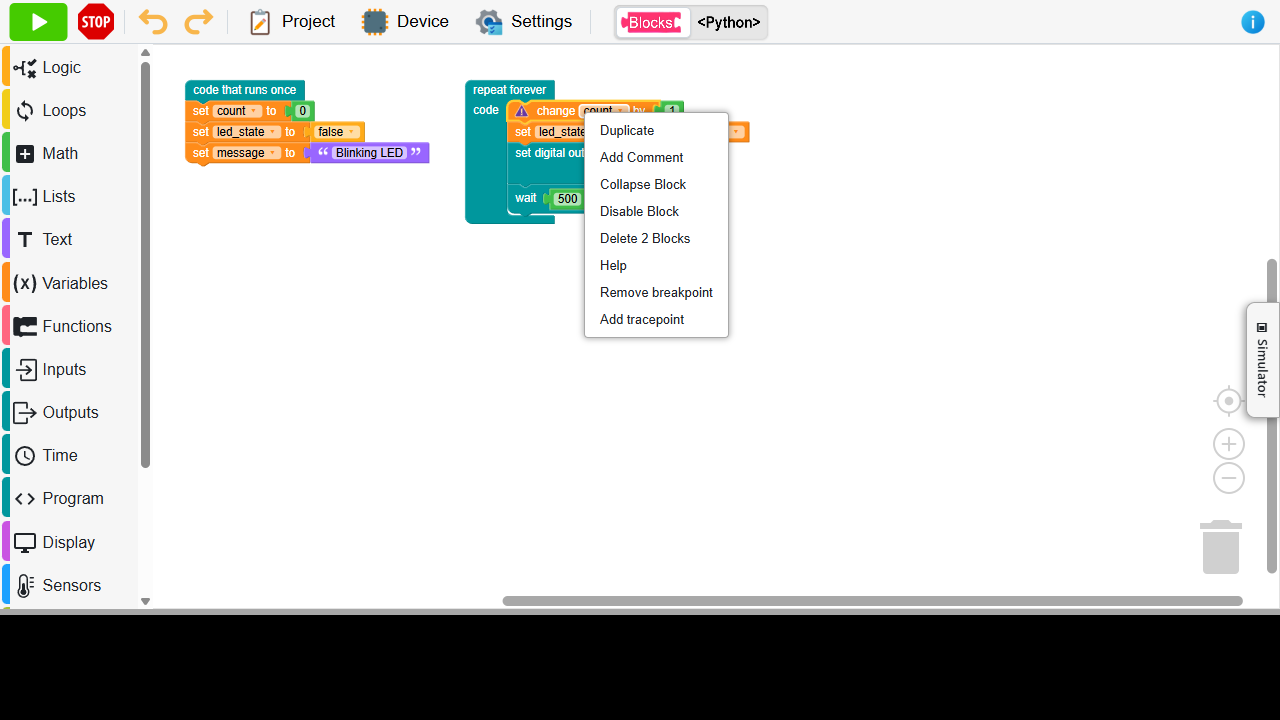
Not every colored tile is a place for a breakpoint
The menu is not displayed for value blocks, such as a single number, variable, or comparison, or for shadow or disabled blocks. Mark the command that uses such a value. A point in a program section that is not generated or executed cannot cause a stop.
Tags are part of a block project: they are saved with it and support Back/Redo. When block debugging is active, they cannot be added or removed at runtime, because the uploaded program has the point locations already fixed.
What you will see when you stop
The opened window Program debugging will show the status Paused before block: and the name of the command. There is a pause symbol next to the title. The highlighted block has not yet been executed; the table contains the state before its execution.
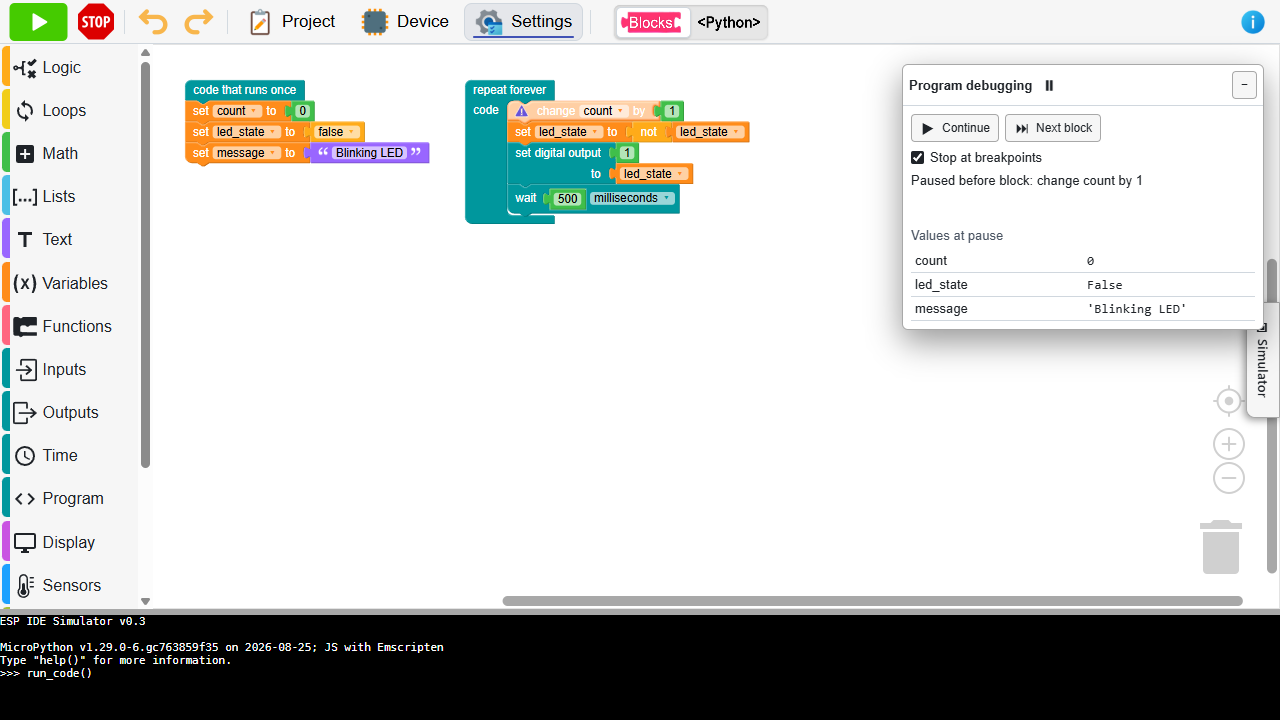
In the picture, there is a breakpoint on the command add 1 to variable count. The value of count is currently 0. Addition will take place only after the continuation or after the step.
Continue or Next block
| Button | What it does |
|---|---|
| ▶ Continue | Releases the current stop. The program continues normally until the next breakpoint reached. |
| ⏭ Next Block | Lets the current statement execute and stops before the next debug statement, even if there is no custom breakpoint on it. |
| Stop in IDE top bar | Terminates the program. This is not the same as waiting on a breakpoint. |
Stepping follows command blocks for which the generator has prepared debug points. It doesn't stop separately on each entered number, operator, or variable value, and it doesn't break the inside of the library into individual Python lines. The actual next command also depends on conditions, loops, and function calls.
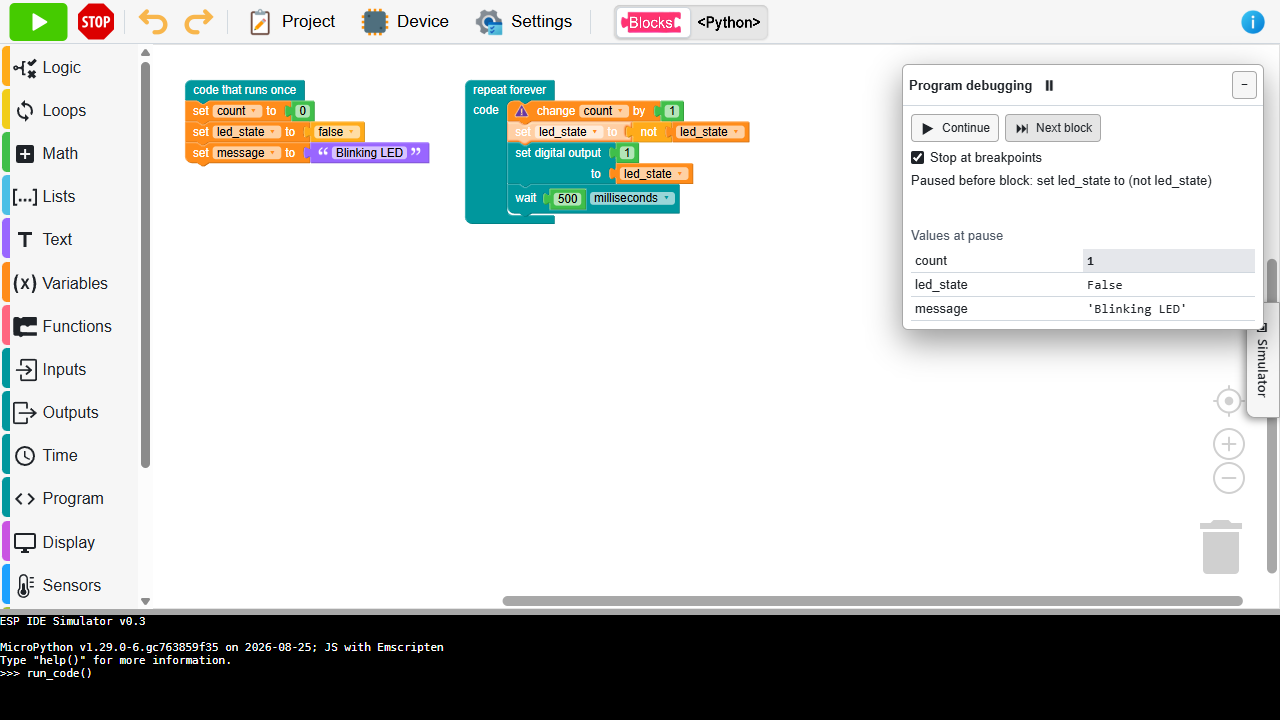
In the sample, count changed to 1 after one step. The program now waits before changing led_state, so its value is still False. The changed counter cell is highlighted.
If a step starts a wait or slow operation, the next stop will come after it. Buttons are temporarily disabled while sending a command or waiting for full values; additional clicks will not speed up the run.
Temporarily continue without stopping
Do you want to let the program run and return to stepping before an interesting event? In the debugging window, turn off the Stop at breakpoints check box.
- If the program is already waiting at the breakpoint, it will start after accepting the change. You don't have to click on Continue.
- The program does not stop during further passes of breakpoints. Instead, it sends values from them as it does from tracepoints.
- When you want to step again, turn the checkmark on. After processing the command, the program stops when the next breakpoint is reached.
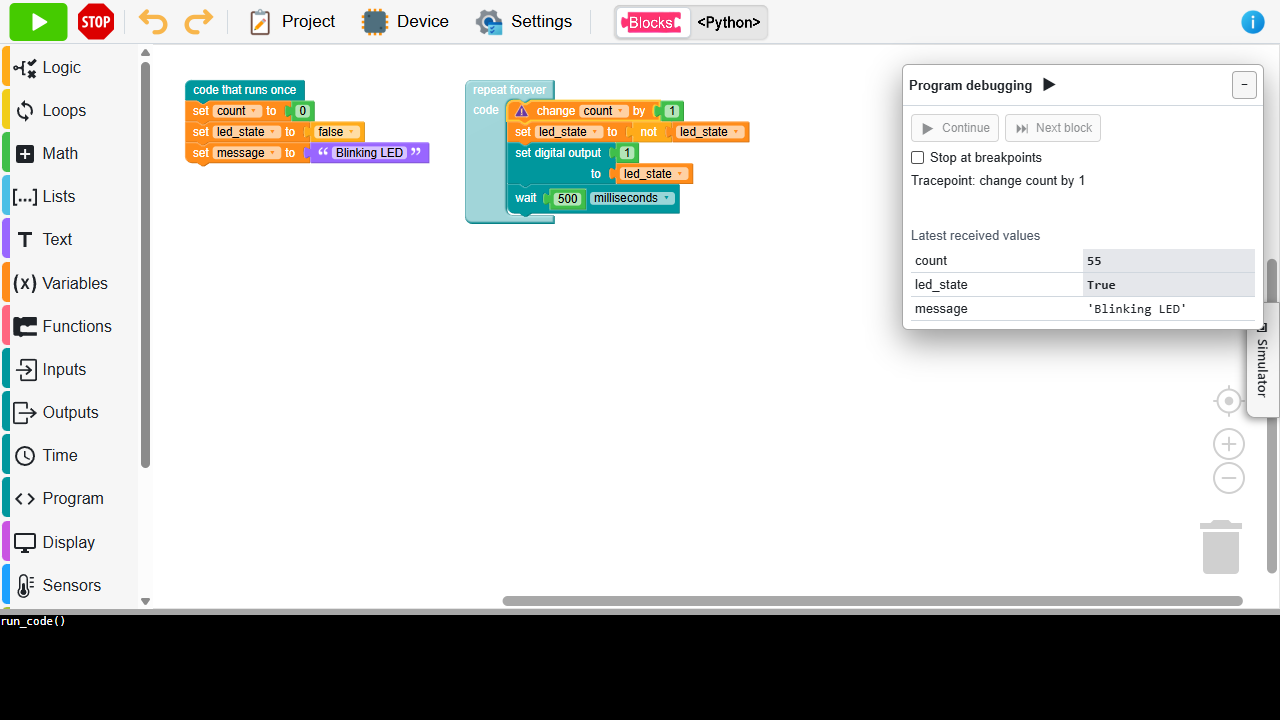
The switch applies to breakpoints of the current run together. Their location does not change and does not require re-uploading. Individual tracepoints remain tracepoints even after stopping is re-enabled.
The change is not an immediate pause anywhere in the program
The text Waiting for mode confirmation… means that the IDE is waiting for program confirmation. The command is processed at a prepared checkpoint, for example, when the next breakpoint is reached. If the program waits a long time in another operation or no further point occurs, the confirmation may come later. The checkmark alone does not prove that the program has already accepted the change.
Each new run of a program with breakpoints starts with stop enabled. The pass-through mode from the previous run is not carried over.
Practical error finding procedure
Place a breakpoint before the part you want to view. If an interesting situation appears only after a long time, temporarily disable stopping and watch the variables. Before the expected event, turn it back on and use Next block. After modifying the program, run the new version so that the tags and uploaded code match again.
Details about changed values, window control and transmission errors can be found in debug window and problems.