Render graphic design (espide_display_designer)
What it does: Renders a scene created in the Graphic Designer to the display's framebuffer. The scene, including the objects and their links, is saved in the .blk project.
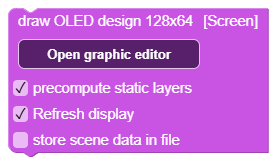
What the Graphic Designer looks like
The Open graphic editor button on this block opens Display Designer. In it, you compose the screen from texts, shapes, drawings and bitmaps. You edit the properties of the selected object on the right and you can enable dynamic inputs for connection with the program.
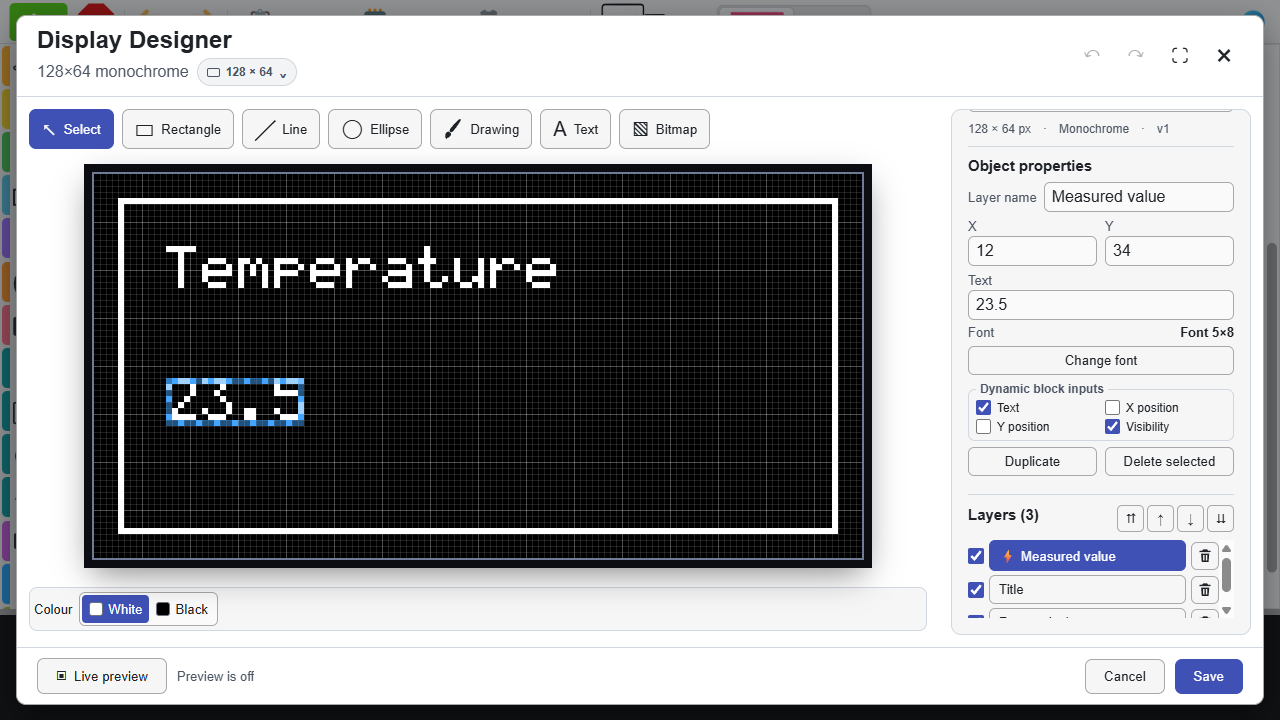
Open complete Graphic Designer chapter — from opening and saving a design to dynamic objects and scene files. Click on the image to go directly to the description of the individual parts of the window.
The Save button in the designer returns the scene to this block. Then save the entire project in the usual way; just saving the design does not start the program on the display.
Block options
| Option | What it does |
|---|---|
| Open graphic editor | Opens the scene designer. The resolution and available profile adapt to the supported display initialization block; without it, the design starts at 128 × 64 points. |
| Precalculate static layers | Default on. It prepares immutable parts of the scene during code generation so that they do not have to be reassembled from individual drawing commands when rendered. |
| Refresh display | Default on. After drawing, it transfers the framebuffer to the display. If you turn off the option, you can add another drawing and refresh the display with a separate block. |
| Put data into file | Default disabled. It applies to all project scenes together. Static assets are loaded from /gfx/scene.dat instead of being embedded in Python. It saves program RAM; the display framebuffer is still needed. |
Inputs and output
Inputs for text, X, Y and visibility are added according to the dynamic properties of the objects. Attach a variable or expression; values are evaluated when this block is executed. Changing the variable itself does not redraw anything.
The block has no value output. The display needs to be initialized beforehand. For variable content, put a block in a loop, for a one-time screen after initialization after startup.
Detailed designer instructions
| I want to… | Where can I find the procedure |
|---|---|
| Open the designer and save the scene to the project | Open and Save |
| Understand the toolbars, canvas and object properties | Window Layout |
| Draw shapes or set coordinates and size | Drawing Tools, Coordinates, Size and Color |
| Add text, change font or insert image | Text and fonts, bitmap import |
| Select objects and change their order | Working with layers, keyboard shortcuts |
| Display the value of a variable from the project | Link dynamic inputs to variable, text formatting |
| Move or hide object by program | Dynamic Position, Dynamic Visibility |
| Use a different resolution or a display add-on | Resolution by initialized display, WeAct e-paper |
| Save scene to file and save RAM | Save data to file, where RAM is saved |
| View the proposal directly on the connected display | Live Preview |
Tips and pitfalls
- Scene name is not a display initialization command. Multiple scenes can use the same display.
- Manually resized or non-empty scene does not expand without further expansion when changing profile. Verify the dimensions in the editor; resizing does not recalculate object coordinates proportionally.
- For file scenes, use the normal run block project in the IDE, which will prepare the necessary files. When manually porting Python itself, you have to port them as well.